Installing Anaconda on AWS EC2 under Windows
Introduction:
Amazon web services (AWS) provide a rich infrastructure for applications with heavy computational and storage demands. Elastic compute cloud (EC2) is one of the services provided by Amazon that provides infrastructure for computing. Here, I explain how to prepare an EC2 instance, install Anaconda on it, and use it through a Jupyter Notebook in Windows 10. I will use a Linux instance on EC2.
Run an EC2 instance
1) Log in to AWS and go to EC2
2) Lunch an instance (blue button)
2) Lunch an instance (blue button)

3) Select your instance (e.g, “Amazon Linux 2” instance) and follow all steps the online wizard takes you to, before the last
4) At the last step, when you click "Lunch", select "Create a new key pair" and give it a name (e.g., anaconda_tut) and click "Download Key Pair". It will download a file called "anaconda_tut.pem".

5) Put "anaconda_tut.pem" to a folder ("ML" folder)
6) Click "Lunch the instance"
7) Click on "Services" at the top left next to "AWS" icon and select "EC2"
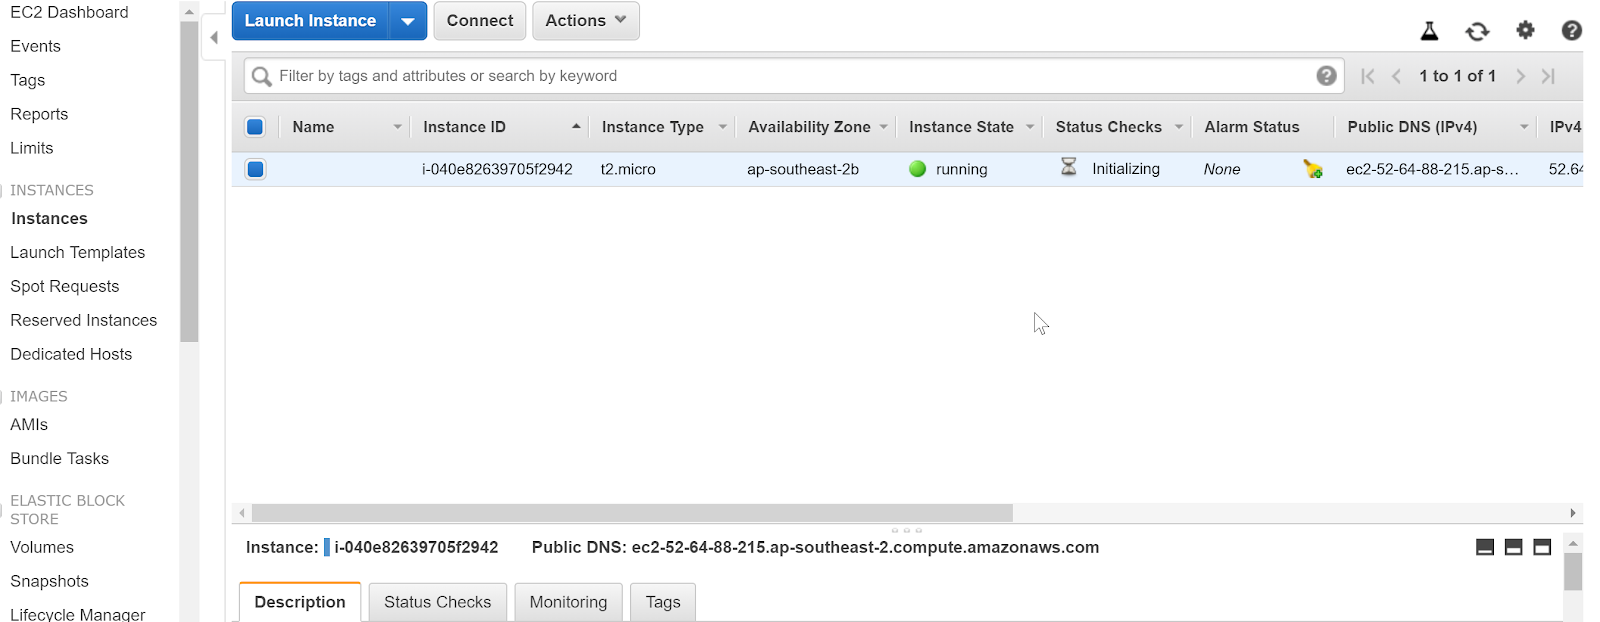
8) Click on "running instances". You should see:
Install Anaconda 3
1) Go to your running instances in AWS and select the EC2 instance (above image) and click connect. It provides you with the "ssh" command to connect to this instance, looks like: ssh -i "annaconda_tut.pem" ec2-user@ec2-....compute.amazonaws.com
2) Open a powershell at the folder where the "anaconda_tut.pem" file is (shift+right click) and copy the ssh command to the shell. Note, this will only work if you have enabled "open ssh" in windows. Otherwise, use Git Bash to do this (there are many other ways, like Putty, but I personally like git bash for command line)
3) Type yes when you are asked about "Are you sure ..."

4) Download a proper anaconda from https://repo.continuum.io/archive/ using “wget ANACONDA LINK” (type "wget https://repo.continuum.io/archive/Anaconda3-5.2.0-Linux-x86_64.sh" in the terminal where you are connected to the EC2) to your EC2 storage. It will download anaconda for you in your instance.

5) Now install Anaconda: "bash Anaconda3-5.2… .sh". This would take a while to install
6) Make sure it is added to the path (Anaconda asks if you want to add to the path, say yes)
6) Make sure it is added to the path (Anaconda asks if you want to add to the path, say yes)
7) Type "source .bashrc" to source the new installation
Connect the Jupyter notebook
1) Run a shell, and ssh to the instance (steps 1 and 2 of the section "Install Anaconda")2) After ssh, run "jupyter notebook --no-browser --port=8888". This essentially runs a jupyter notebook on the EC2 instance on the port 8888. Now, we need to connect the local jupyter notebook to the one running on the EC2. This is done by mapping the port EC2 is using for jupyter (8888) to the port our local jupyter is going to use (8000). To do so:
3) In a new Shell, first change the permission to the anaconda_tut.pem by: chmod 400 anaconda_tut.pem
4) now map the port 8888 from AWS to 8000 on the local host by: ssh -i "anaconda_tut.pem" -L 8000:localhost:8888 ec2-user@....compute.amazonaws.com.

4) In the first shell, there is a line like: http://localhost:8888/?token=a2f502cf5fc..., copy that, change 8888 to 8000, and put that in a browser. Note, there is a little bug in this link, it has the token twice! It is like http://localhost:8888/?token=a2jh...&token=a2jh... Make sure you only copy the string until '&' (not the '&' itself).
Enjoy your Jupyter notebook on your browser, with AWS infrastructure.
Like always, comments are welcome.
By R.B.


Comments
Post a Comment